
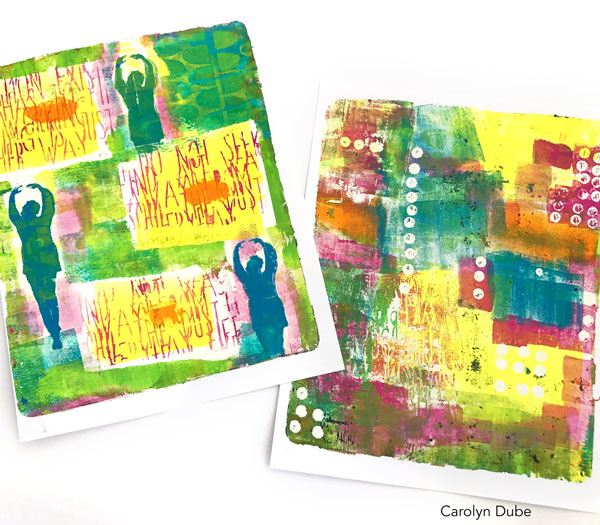
We’re using all 3 aspects of the FUNdamentals to make this print in one pull. The paint, the pattern, and the pull all impact the final print. You’re seeing the process of building the composition in this video. It’s lots of layer, but the print happens in just one pull.
Video password:gelprinting
Watch/Download on Vimeo. Need help downloading or with other technology issues? Check out the technical help page here.
Stencils and masks can be anything. I ripped some shapes from book text (and yes, I was trying to make circles and they ended up wonky ovals).
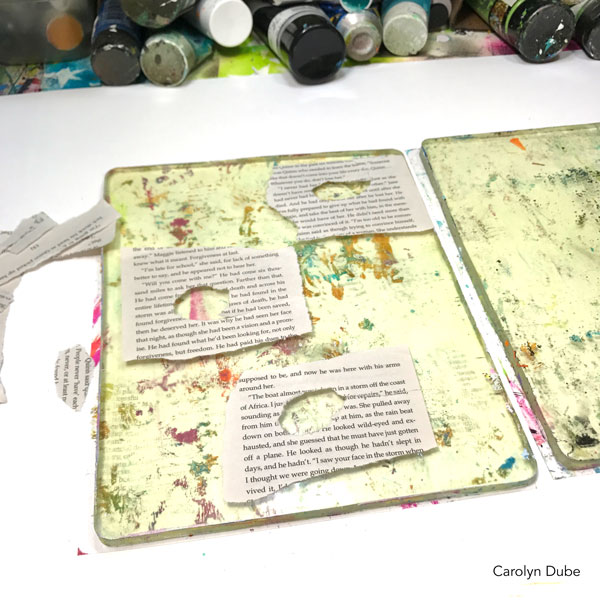
Since the gel plate grabs the paper, it keeps them in place as I brayer color on and add stenciling.
Once the book text was removed, there was naked space. But it was a very small space, too small for a brayer to work in so I needed a tool that could give me “surgical” precision. A cheap cosmetic sponge.
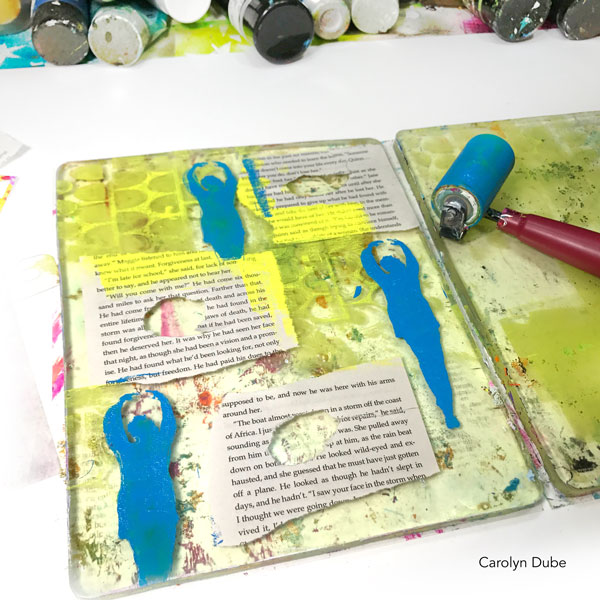
Since I am working with wet paint, as I’m stenciling, I hold the stencil up so it doesn’t touch the blue guys. I really wanted those blue guys to stay pristine.
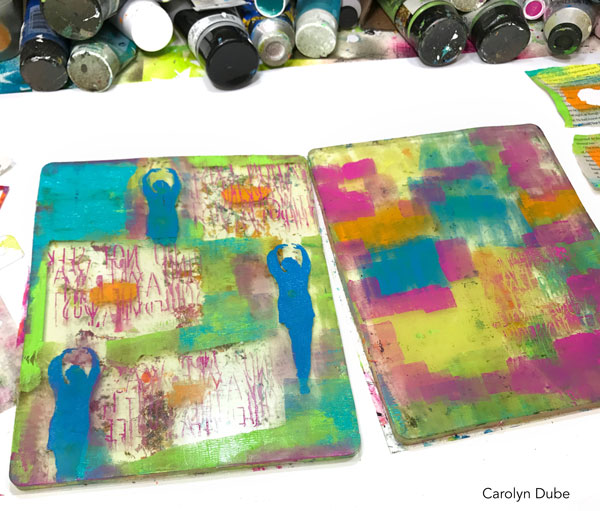
Using up the excess paint on the cosmetic sponge on the clean up plate. It has created a very different look than what I would have with a brayer.
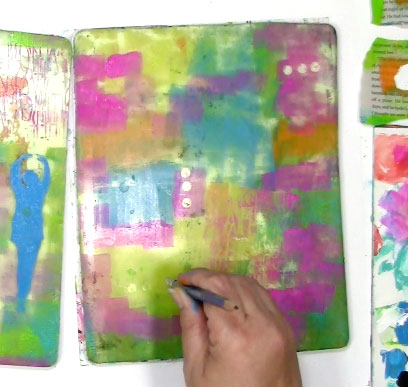
Anything can be a pattern making tool. Using the eraser on a pencil allowed me to create small circles by lifting up the paint that was almost dry on the plate. It was still tacky/sticky so it came up very easily with the eraser.
As paint builds up on a texture tool, it removes less paint. So for a crisp image, clean the eraser off frequently. If you like the imperfect circles, don’t clean it off much.
Once it was all dry, it became a giant let it ride print so I added white paint to the plate, put the paper on top, and let the paint dry completely because I wanted to get the entire image to pull up.
All 3 of the FUNdamental areas were used to build this print.
Paint: How I added the paint (brayer or cosmetic sponge mixing, adding wet paint on wet paint, letting paint dry before adding another layer, or avoiding BFF’s and Frenemies) impacted the final print.
Pattern: How I added the pattern, from torn paper to stenciling patterns on top of to the pencil eraser impacted the final print.
Pull: How long I let the white paint dry impacted the final print.
Bottom line, everything you do with the paint, the pattern, and the pull creates the final print.
Now it’s your turn to play! Add layers to your plate and take the pull. Then take a moment to find the very first layer you put on the plate and notice how it impacted your final print. I’d love to see your prints in theFacebook group and let us all know what was the first layer you put on there!
Supplies used in this lesson:
Cosmetic sponge
Pencil
Book text
Liquitex Heavy Body: Medium Magenta, Cobalt Teal, Yellow Light Hansa, Vivid Lime Green, Brilliant Blue, Cadmium Orange Hue, Titanium White
Paper:90lb paper, a light cardstock at Amazon.
8×10 gel plates: Gel Press Plates at Amazon Gel Press Plates at DickBlick
2″ brayer: at Amazon at DickBlick
You can find all the supplies in used in all the lesson here.