

My how time flies! It is so cliche but it’s true! These 3 weeks have flown by at lightning speed for me. I hope you’ve had fun and become more comfortable with the FUNdamentals of gel printing. I have loved seeing your prints and talking with you on the Facebook Lives! This may be the last lesson of the workshop but you have forever access and can come back any time you want to watch and play. I’ll continue to be a regular in the Facebook group for the next 3 weeks.
How are we wrapping up our play? By dealing with more ho hum prints. Just remember that what we each call the yucky or ugly ones is a very personal preference. What I would call a hot mess to a yucky print someone else might swoon over it. Actually, what I think is a hot mess today I could love tomorrow because my mood plays a big part in how I see my prints.
Video password:gelprinting
Watch/Download on Vimeo. Need help downloading or with other technology issues? Check out the technical help page here.
Video password:gelprinting
Watch/Download on Vimeo. Need help downloading or with other technology issues? Check out the technical help page here.
How do I store my prints? I will put them on a shelf, in a basket, in a cabinet, anywhere but I sort them before they are put away. I have 3 categories for a print:
- ones that feel about complete
- ones that just need more
- ones I don’t like at the moment (this helps remind me that they will change…no need to give up on them). It is very personal preference how you sort your prints so what I would call a hot mess to a yucky print someone else might swoon over it.
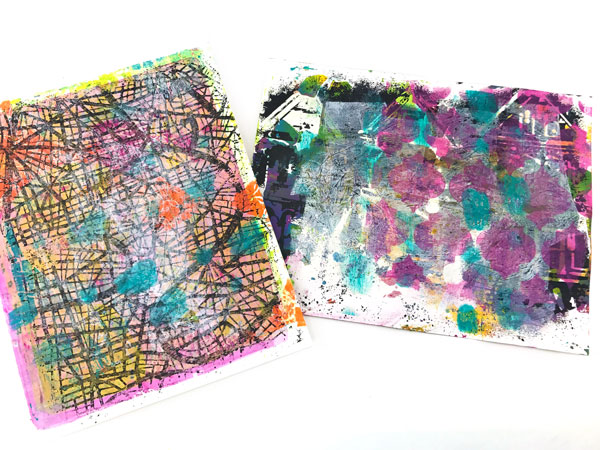
Just putting another area of color on it can change it. I knew the print on the left felt too dark so I added a lighter color, the yellow frame. For the prints at I really don’t like, I will clean off the brayer on it just to build up some color and pattern. Once that was done on the print on the right, I began to like it more.

Let the layers build up. Even if it goes slowly, you might be very pleased with where it ends up. The brayer blobs of paint are a quick way to get some random color happening on a print. The white ghost print on my map below became clouds floating high above that city and the more I look at it, the more I fall in love with the aeriel vibe I am getting from it.
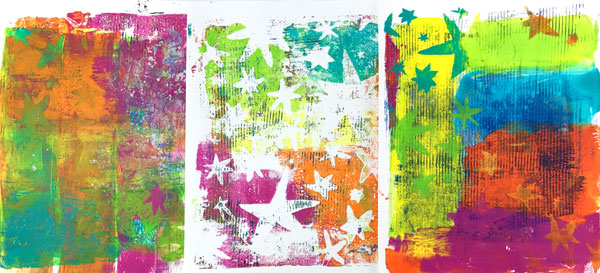
When I am adding layers, if I see a grungy wonderful print building up on the plate, I am free to grab a blank piece of paper because sometimes the details get lost…like what you saw happen with the Stars stencil in the video.
Now it’s your turn to play! Grab your prints, sort them into stacks, ones that feel pretty complete, ones that just need more, and ones you don’t like at the moment. Then take the ones that need more and the ones you don’t like at the moment and start adding layers. You bet we want to see your prints in the Facebook group!
Supplies used in this lesson:
Stars Inspired by Matisse stencil
Liquitex Heavy Body: Medium Magenta, Cobalt Teal, Yellow Light Hansa, Vivid Lime Green, Cadmium Orange Hue, Titanium White, Phthalo Blue (Red Shade)
Liquitex Basics: Brilliant Yellow Green
Old vitamin bottle to make circles
Word stamps from previous lesson
Gnocchi tool
Shelf liner
8×10 gel plates: Gel Press Plates at Amazon Gel Press Plates at DickBlick
2″ brayer: at Amazon at DickBlick
You can find all the supplies in used in all the lesson here.