
More gel printing play and fun to come with another video for you! This lesson will be available very very soon but not quite yet…but just know there may be a little color involved…a few pieces of paper…and prints to make you smile!
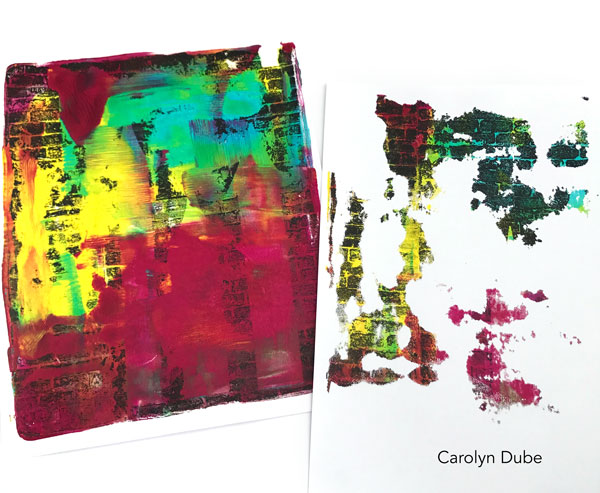
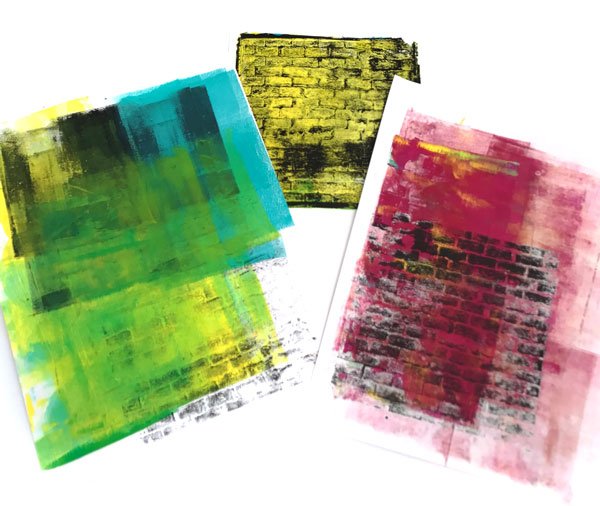
Brick by brick we’re building prints today. Okay…not really little brick by little brick since I’m not that patient, but definitely layer by layer! Be sure to notice how the main technique was the catalyst for a wide variety of prints as most of them were all about using up the paint or pattern on the plate. The only way I could have gotten to the print at the top of this page that I so love, is by making all the prints that came before it.
Video password:gelprinting
Watch/Download on Vimeo. Need help downloading or with other technology issues? Check out the technical help page here.
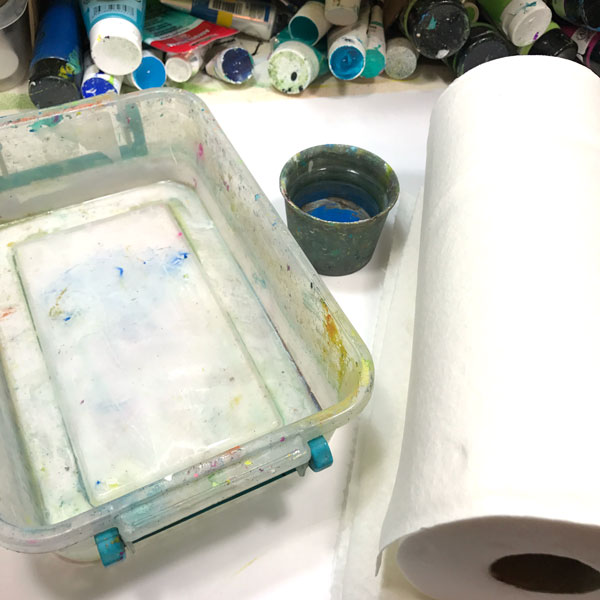
When stamping with paint, it is very important to have a tray with wet paper towels in it ready to put the stamp on to make it a breeze to get the paint off. Take a couple of paper towels and fold them to the size of the tray/container. Then add water until the paper towels are soaked but there is very little standing water. This way the stamp will just rest on the wet paper towels but not be submerged.
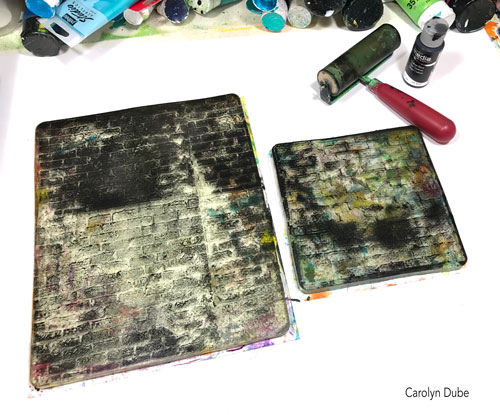
The plates are covered in black paint bricks. I’m saving the larger plate for the stencil technique, but the smaller one I’m going to use as my palette for some rubber stamping. Once I’m done stamping, I put it promptly on the wet paper towel. I’ll clean it off completely when I am all done playing for the day.
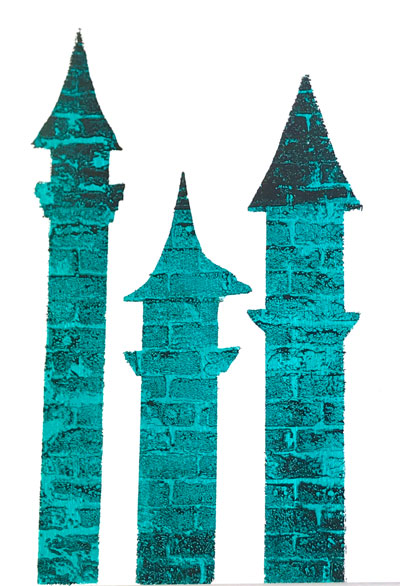
Once the black bricks are completely dry, I put the stencil on top and added the teal paint. Notice the paint is applied on the stencil. This gives me the best chance of not having any paint run under the stencil.
The stencil was removed and while the teal paint was still wet, I put a piece of paper on there. I let the paper stay on there until the teal paint was completely dry.
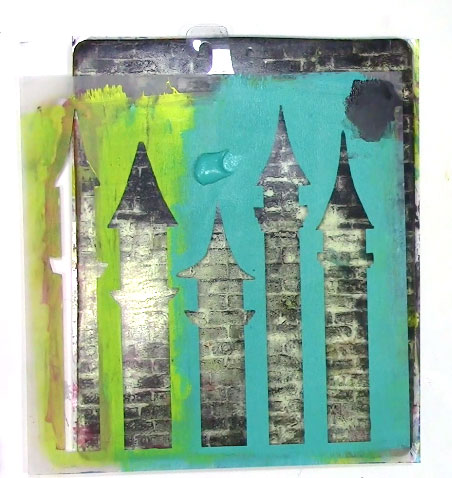
Once the teal paint was completely dry, I pulled the print. Only where there was wet paint did the black brick pattern lift up.
The rest of these prints aren’t the primary technique, but are the colorful side benefits of using up all the color and pattern. I find the most wonderful unexpected prints build up when I am cleaning off the brayer, grabbing the last bits of pattern off the plate, or using up excess when I’ve made a bit of a paint swamp on the plate.
Now it’s your turn to play! Grab a stamp, a stencil, and your plate! Looking forward to seeing your prints in the Facebook group!
Supplies used in this lesson:
DecoArt Fluid acrylics: Hansa Yellow Light, Quinacridone Magenta, Carbon Black
Liquitex Heavy Body: Cobalt Teal,
Paper:90lb paper, a light cardstock at Amazon.
8×10 & 6×6 gel plates: Gel Press Plates at Amazon Gel Press Plates at DickBlick
4″ brayer: at Amazon at DickBlick
You can find all the supplies in used in all the lesson here.